

Facebook Business Page: A Magic Wand for Businesses in the Modern World
In this modern world of technology, social media is like a magic wand for businesses. It helps them connect with people who might be interested in what they offer. One of the coolest places to do that is Facebook. You’ve probably heard of it, right? Well, Facebook has over 2.8 billion people using it every month! That’s like having the attention of a whole bunch of people at once.
So, if you want your business to shine online, creating a Facebook business page is a smart move. It’s like having your own little corner on Facebook where you can show off what you do. Plus, it can help you reach even more people, make your brand known, and send folks to your website.
Now, let’s get into the nitty-gritty. I’m going to guide you through the simple step-by-step process of creating an amazing Facebook business page.
Step 1: Create a Personal Facebook Account
To create a Facebook business page, you need to have a personal Facebook account first. If you don’t have one, you can create one for free. Here are the steps:
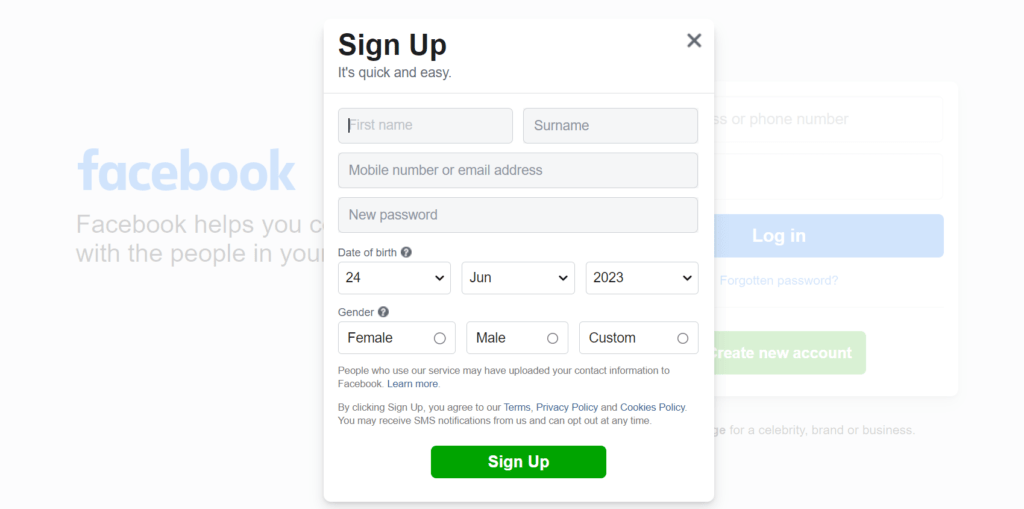
- Go to the Facebook website or app.
- Click on the Create New Account button.
- Enter your name, email address, and password.
- Create a username and profile picture.
- Agree to the terms and conditions.
Step 2: Choose a Name and Category for Your Facebook Page
Step 2: Choose a Name and Category for Your Page
Once you have a personal Facebook account, you can proceed to create a Facebook business page. Follow these steps to choose a name and category for your page:
Log in to your personal Facebook account.
On the top navigation bar, locate the ‘Menu’ icon. Click on it, and a drop-down menu will appear.
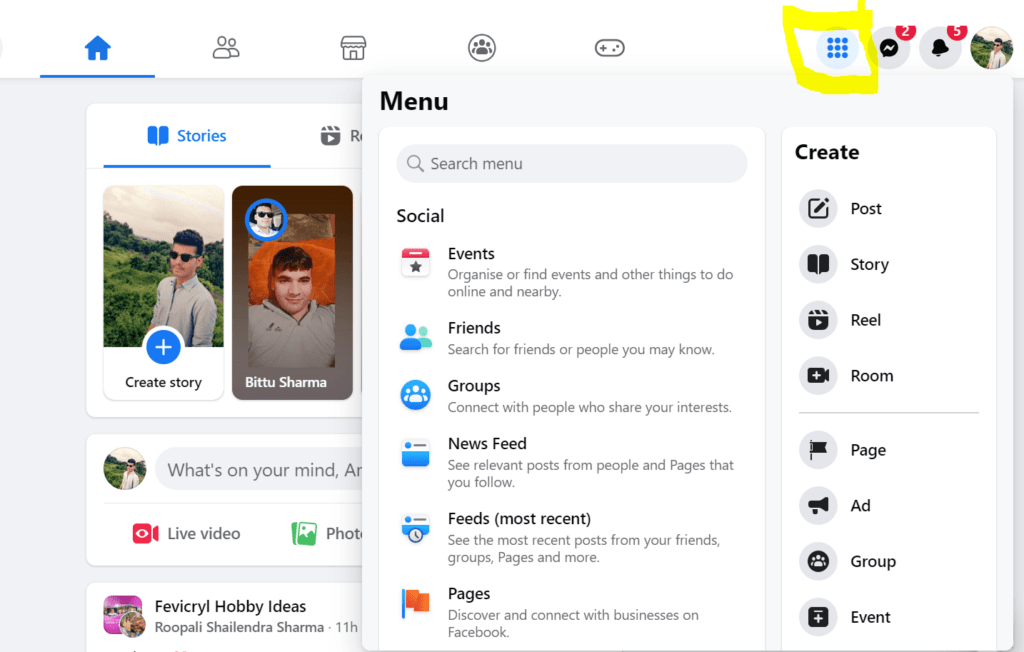
From the drop-down menu, select “Page.” This will take you to the page creation process.
Enter the name you want to give to your page in the designated field. Choose a name that accurately represents your business, brand, or community.
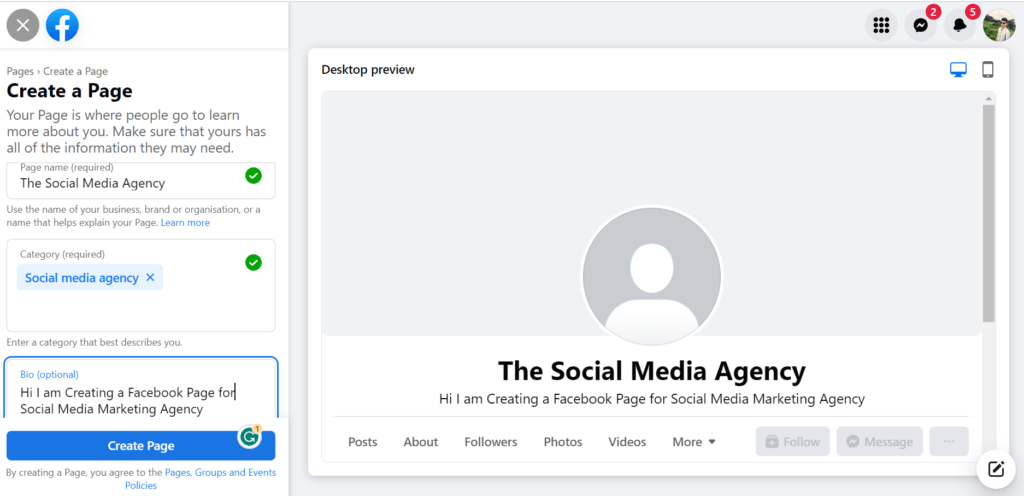
Next, select the appropriate category for your page. This will help Facebook understand the type of page you are creating and suggest relevant features.
As you type in the category field, Facebook will provide suggestions. Select the most relevant category from the options provided.
After selecting the category, click on the “Continue” button.
Review the Facebook Pages Terms and click on the checkbox to indicate that you agree to them.
Click on the “Create Page” button to proceed to the next step.
Step 3: Complete Your Business Information
After choosing a name and category for your Facebook page, it’s important to complete your business information to provide essential details for people to find and contact your business. Follow these steps to complete your business information:
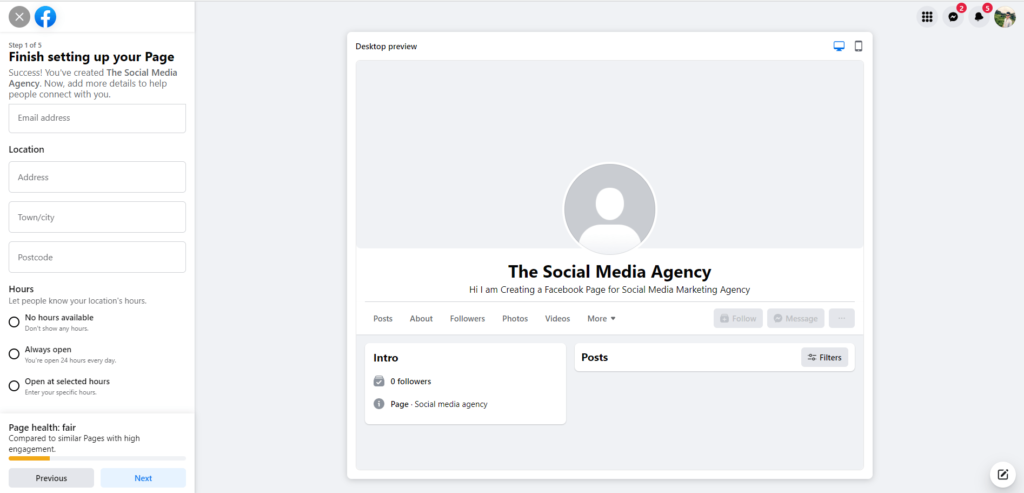
You will be taken to the “About” section of your page, where you can add and update various details about your business.
Start by entering your Website name in the appropriate field. Make sure it is accurate
Enter your business Mobile number. This will allow customers to contact you directly if they have any inquiries or need assistance.
Add your Email address
Next, provide your business address. If your business has a physical location, enter the complete address including street, city, state, and ZIP code. If you don’t have a physical address or operate online, you can skip this field or mention that your business is online-based.
Specify your business hours of operation. This information is helpful for customers to know when they can reach out to you or visit your physical location.
As you fill in the information, make sure to review it for accuracy and completeness.
Once you have entered the necessary information, click on the “Save” or “Submit” button to save your changes.
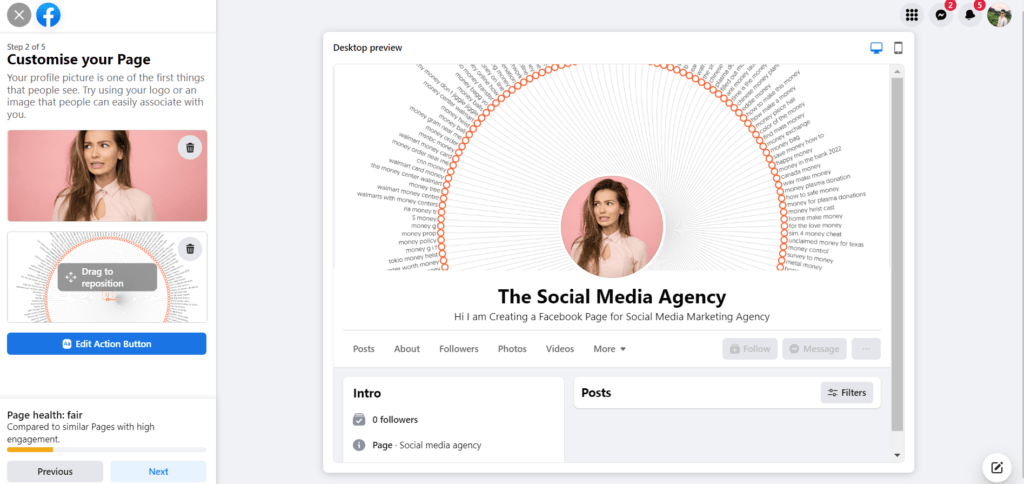
Step 4: Add a Profile Picture and Cover Photo
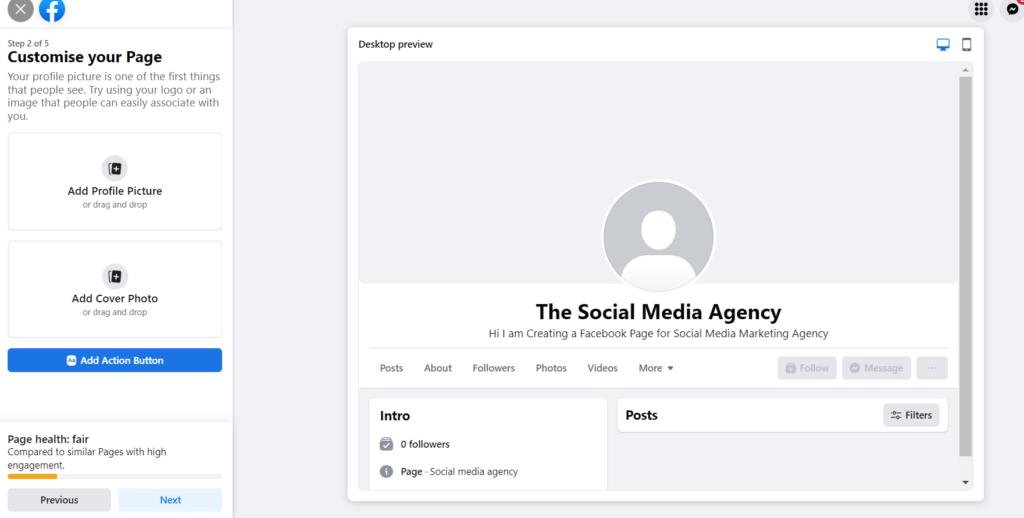
Your profile picture and cover photo are essential visual elements that represent your business on your Facebook page. To add a profile picture and cover photo that are high-quality and effectively represent your business
When you click the next step, this will appear
Step 5: Add an Action Button
An action button on your Facebook business page is a powerful tool to encourage visitors to take specific actions that align with your business goals. Follow these steps to add an action button of your choice:
- On your Facebook page, below the cover photo, you will see a button that says “Add a Button” or “Edit Button.” Click on this button to proceed.
- A menu will appear with various options for action buttons. Examples include “Book Now,” “Sign Up,” “Start Order,” “View Shop,” “Get Tickets,” “Send Message,” “Send WhatsApp Message,” and “Call Now.”
- Review the available options and choose the button that best suits your business objectives. For example, if you want customers to book appointments, select “Book Now.” If you want to direct them to your online store, choose “View Shop.”
- Click on the button option you want to add. This will open a new window with customization options.
- In the customization window, you can provide the relevant details for the selected action button. For instance, if you chose “Book Now,” you may need to enter the booking URL or connect it to a booking system.
- Fill in the required information based on the action button you selected. This may include website URLs, email addresses, phone numbers, or other necessary details.
- Customize the button text if desired. You can edit the default text to make it more specific and appealing to your audience. For example, instead of “Book Now,” you can change it to “Schedule an Appointment.”
- Preview the button to ensure it appears as intended.
- Once you are satisfied with the settings, click on the “Finish” or “Save” button to add the action button to your Facebook page.
6. Connect your Page with Whatsapp
Connecting your Facebook page with WhatsApp allows users to easily communicate with your business through WhatsApp messaging. Here’s how you can connect your page with WhatsApp:
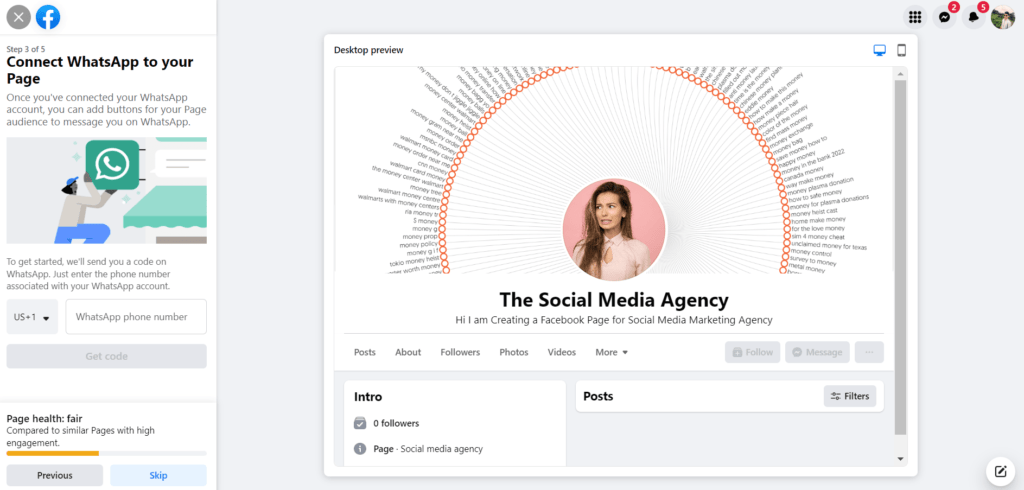
- Ensure that you have a WhatsApp Business account set up. If you don’t have one, download the WhatsApp Business app on your mobile device and follow the steps to create an account.
- On your Facebook page, click on the “Add a Button” or “Edit Button” option below the cover photo.
- In the menu that appears, select the “Send WhatsApp Message” option. This will open a new window.
- In the WhatsApp Message window, enter the phone number associated with your WhatsApp Business account, including the country code. Make sure the number is accurate and active.
- Optionally, you can pre-fill a default message that will appear when users initiate a conversation on WhatsApp. This can be a greeting or a prompt to provide the necessary information.
- Review the details you entered and ensure they are correct.
- Click on the “Finish” or “Save” button to connect your page with WhatsApp.
- Facebook will verify the connection by sending a verification code to your WhatsApp Business account. Follow the instructions provided to complete the verification process.
- Once the connection is verified, users visiting your Facebook page will be able to click on the WhatsApp button and initiate a conversation with your business through WhatsApp.
Step 6: Optimize Your Page for Search
Optimizing your Facebook business page for search is crucial to ensure that people can easily find your page when searching for businesses similar to yours. Here’s how you can optimize your page for search:
- Use a clear and descriptive page name with relevant keywords.
- Choose the correct category that represents your business.
- Provide complete information about your business, including contact details and hours of operation.
- Regularly post engaging content that showcases your products or services.
- Encourage customers to leave reviews.
- Respond promptly to comments and messages.
- Use relevant hashtags in your posts to increase discoverability.
Step 7: Start Posting
Once you’ve created your business page, it’s time to start posting! Share updates about your business, new products or services, and special offers. You can also use your business page to run contests and promotions.

You can start by telling your followers about any new things happening, like new products or upcoming events. Share pictures or videos to show what you offer and explain why it’s great.
You can also give special discounts or offers just for your Facebook followers to make them feel special. Running contests or giveaways is another fun way to keep your audience engaged.
You can share helpful tips or educational content related to your business to show that you know a lot and care about your customers.
Be consistent in posting and try to find a good balance between promoting your business and sharing other interesting things.
Remember to respond to comments, messages, and reviews to let your customers know you appreciate them.
Conclusion
Creating a Facebook business page is like wielding a magic wand for businesses in the modern world. It offers a platform to connect with billions of people, showcase products or services, and drive online visibility. By following simple steps like creating an account, choosing a name and category, and adding business information, visuals, and an action button, businesses can optimize their page and start posting engaging content.
Consistency, responsiveness, and a customer-centric approach can lead to success. With Facebook as a powerful tool, businesses can unlock immense opportunities and thrive in the digital landscape.


